Scopomap · Beta
Availability: Enabled per organisation.
Scopomap’s analysis makes strong project context — a location report, a study-area boundary, figures about who lives in an area. Connecting it lets Scopomap send that context straight into your projects, where planning, community insights and EVA can use it, instead of it being downloaded and re-uploaded by hand.
When Scopomap is enabled for your organisation, it appears under Settings → Integrations in the Partners category.
Turning it on
Scopomap is enabled per organisation. If you don’t see it under Settings → Integrations, contact support@cecanvas.com.
Managing the integration is available to organisation owners and admins.
Creating a credential
A credential is what the partner uses to send into your organisation. You decide what it can reach.
- Open Settings → Integrations → Scopomap.
- Copy the API base URL — the partner needs it along with the credential.
- Choose Create credential.
- Decide project access: All projects (including ones created later) or Selected projects only.
- Leave the permissions ticked unless you want to limit what the partner can do.
- Choose Create credential, then copy the credential immediately. It is shown once and cannot be viewed again.
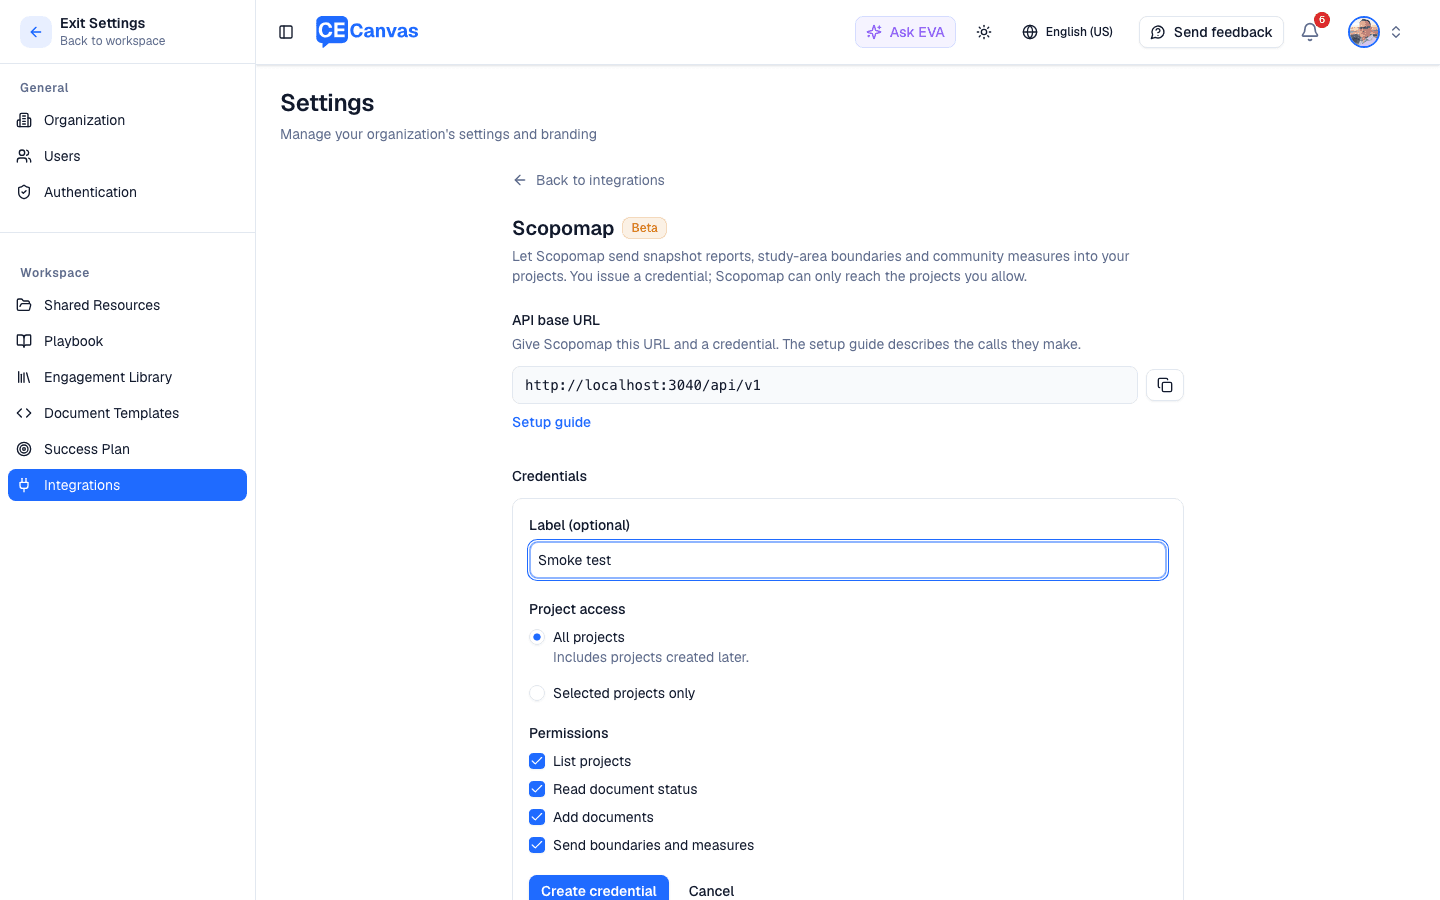
Give the credential and the base URL to the partner through their setup screen. The setup guide link on the page points them to the technical details.
Revoking a credential
Choose Revoke next to the credential. The partner stops being able to send anything immediately. Anything already received stays in your projects.
There is one active credential at a time. To rotate, revoke the current one and create another.
What arrives, and where
Reports and documents appear in the project’s Resources, marked as sent by the partner. Once processed they are searchable and, unless the partner turned it off, available to EVA like any other project document.
Boundaries appear on the Project area screen under Received boundaries, drawn dashed on the map so they’re easy to compare with your own layers. A received boundary is not part of your project area until you adopt it.
Community measures the partner attaches to a boundary appear in the project’s community-context panel in their own section, headed with the partner’s name and the year the figures refer to. They are shown separately from census data and are never combined with it. EVA only draws on them once you have adopted the boundary they describe.
Adopting a received boundary
Received boundaries change nothing until you say so.
- Open the project’s Project area.
- Under Received boundaries, select the one you want.
- Choose what it should be — Project area, Engagement area or Other map layer. The partner’s suggestion is preselected.
- Choose Adopt.
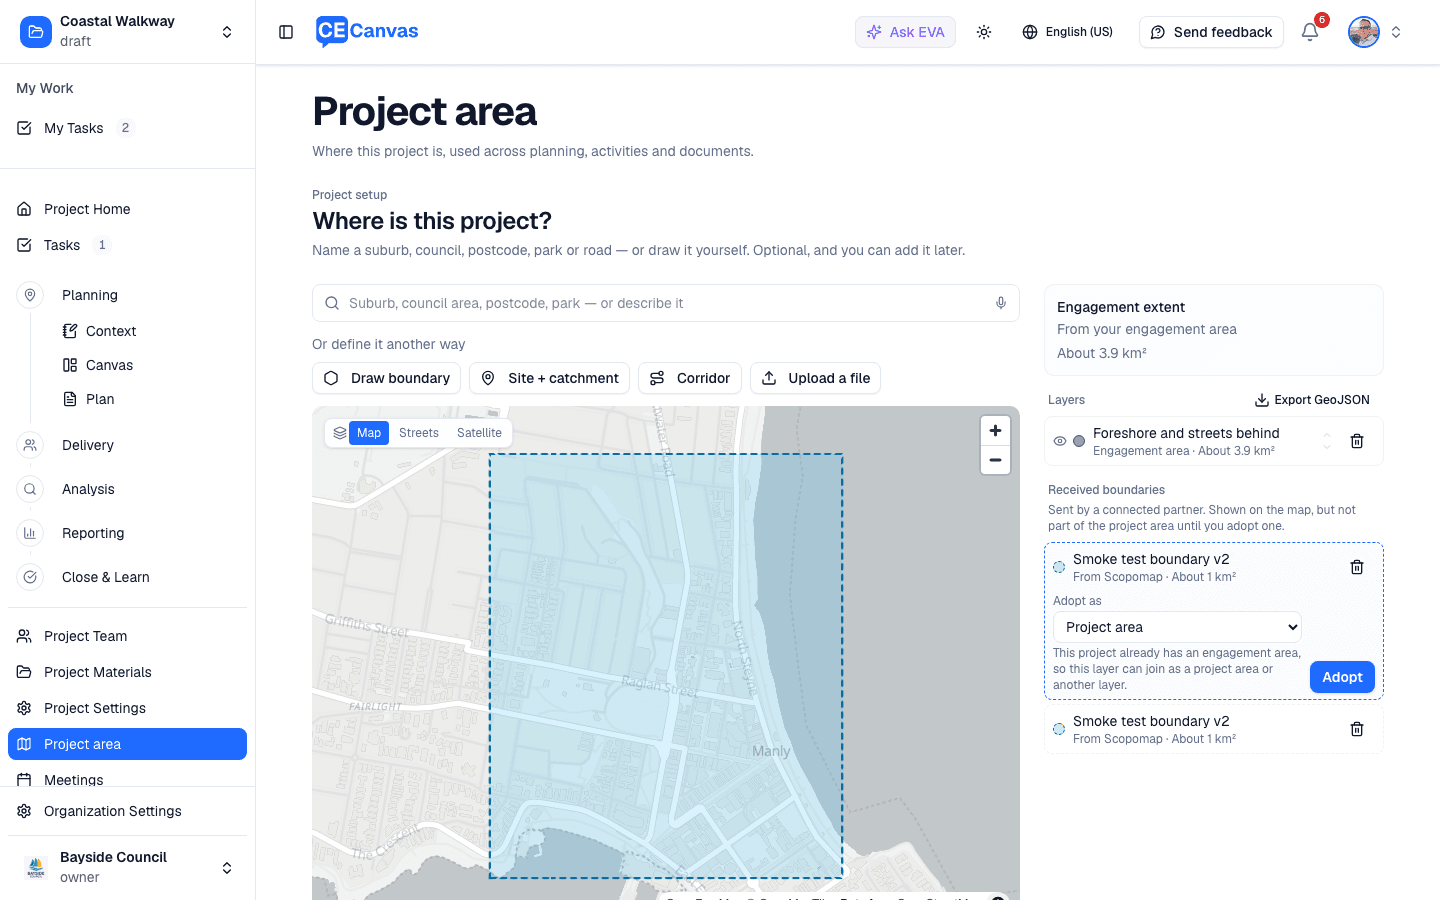
It moves into your layers and takes part in the project area under the usual rules. If the project already had an area, nothing is removed — the adopted layer joins it. If the partner sends the same boundary again later, the new version arrives as a fresh received boundary; your adopted one is left alone.
To discard a received boundary you don’t want, remove it like any other layer.
Permissions and privacy
- A credential can only reach the projects you grant it and only do what its permissions allow.
- Everything a partner sends is recorded against the credential that sent it.
- Partners send aggregates and boundaries — never household or personal data.
- Revoking a credential, or CE Canvas disabling the integration for your organisation, cuts access immediately.
For partners and developers
The technical contract — authentication, endpoints, payloads and limits — is the Partner API reference, with the machine-readable OpenAPI file beside it. Staging is the test tenant; contact us to be set up.